Setup of tracking code for Shopify
If you use Shopify you can follow this guide for easy installation of our tracking code on your e-commerce platform:
Base script for Shopify
1. In your Shopify admin panel under Sales channels, click the Online Store menu.
2. Click the Themes menu.
3. On your current theme, click Actions and then Duplicate (to save a backup)
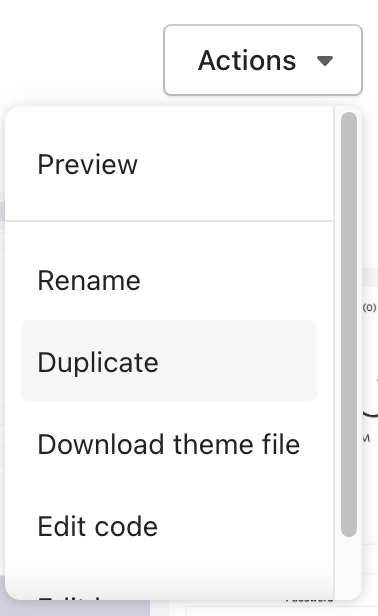
4. On the duplicated them, click Actions again, but this time select Edit code.
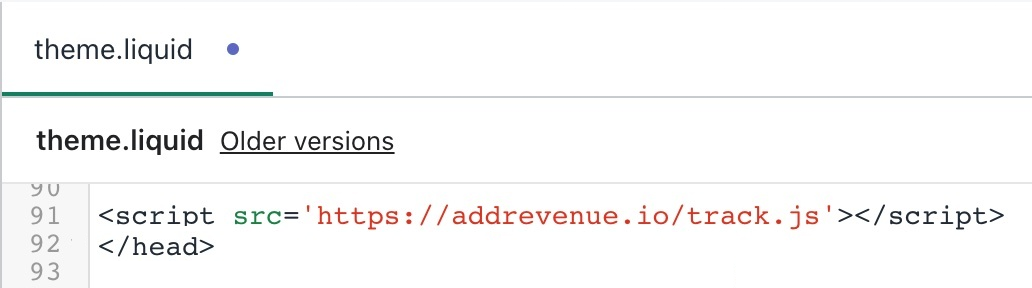
5. Find the file named ”theme.liquid”.
6. Add our base script somewhere in the HEAD section, by copy and paste this snippet:
<script async src='https://addrevenue.io/track.js'></script>
Here, the script can advantageously be loaded async.
When done, it shold look like this:
7. Click Save.
8. Click Actions and select Publish, to activate the changes.
Conversion script for Shopify
1. In your Shopify admin panel go to Settings and then click Checkout.
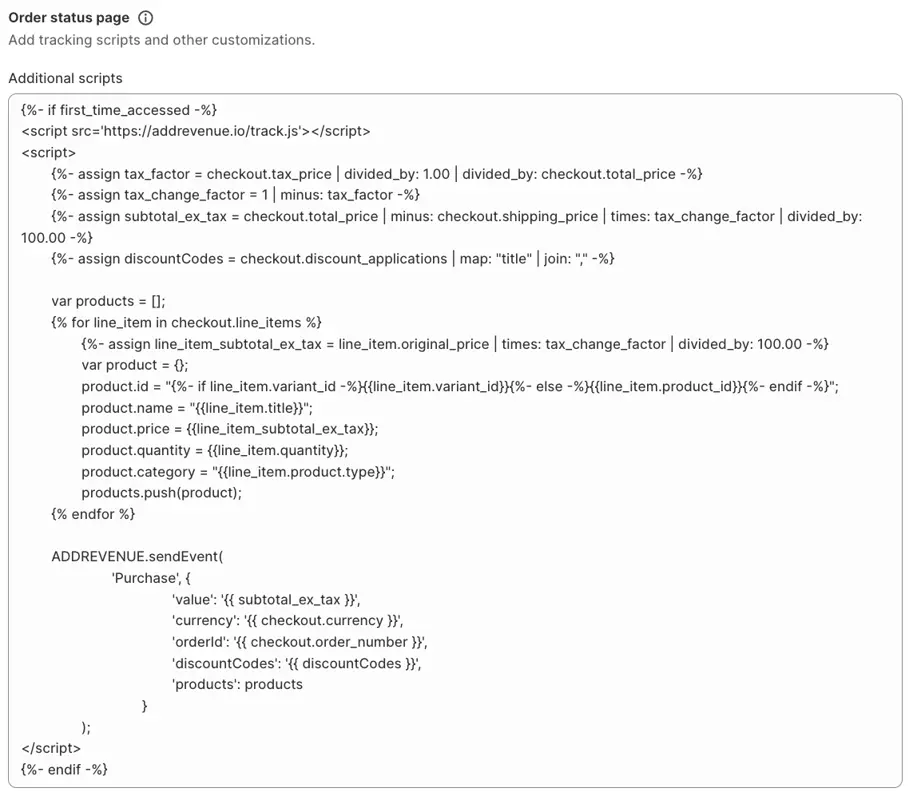
2. Scroll down to the section Additional scripts and find the Order status page field. Copy and pase the following snippet, that is a mixture of Javascript and Liquid:
<script src='https://addrevenue.io/track.js'></script>
<script>
	{%- assign tax_factor = checkout.tax_price | divided_by: 1.00 | divided_by: checkout.total_price -%}
	{%- assign tax_change_factor = 1 | minus: tax_factor -%}
	{%- assign subtotal_ex_tax = checkout.total_price | minus: checkout.shipping_price | times: tax_change_factor | divided_by: 100.00 -%}
	{%- assign discountCodes = checkout.discount_applications | map: "title" | join: "," -%}

	var products = [];
	{% for line_item in checkout.line_items %}
	{%- assign line_item_subtotal_ex_tax = line_item.original_price | times: tax_change_factor | divided_by: 100.00 -%}
	products.push({
		'id': "{%- if line_item.variant_id -%}{{ line_item.variant_id }}{%- else -%}{{ line_item.product_id }}{%- endif -%}",
		'name': "{{ line_item.title }}",
		'price': {{ line_item_subtotal_ex_tax }},
		'quantity': {{ line_item.quantity }},
		'category': "{{ line_item.product.type }}"
	});
	{% endfor %}

	ADDREVENUE.sendEvent('Purchase', {
		'value': '{{ subtotal_ex_tax }}',
		'currency': '{{ checkout.currency }}',
		'orderId': '{{ checkout.order_number }}',
		'discountCodes': '{{ discountCodes }}',
		'products': products
	});
</script>
NB! Shopify differs from many other e-commerce solutions in the sense that the regular theme is not loaded on the receipt page and therefor our base script needs to loaded as a part of the conversion script, as displayed above. Please note that it must absolutely NOT be loaded async here because then the scriptet will not have been loaded when the function ADDREVENUE.sendEvent is called.
When done, it shold look like this:
4. Click Save.
5. Your tracking code is now installed. Once you have installed the tracking code, we want you to make a test purchase. See our Test purchase guide for step-by-step and troubleshooting help.
Create account
By submitting I accept addrevenue.io's terms of use and privacy policy.
This site is protected by reCAPTCHA and the Google Privacy Policy and Terms of Service apply.
By submitting I accept addrevenue.io's terms of use and privacy policy.
This site is protected by reCAPTCHA and the Google Privacy Policy and Terms of Service apply.
By submitting I accept addrevenue.io's terms of use and privacy policy.
This site is protected by reCAPTCHA and the Google Privacy Policy and Terms of Service apply.
Choose the account type that best suits your profile