Setup of tracking code for Google Tag Manager
If you use Google Tag Manager you can follow this guide for installation of our tracking code on your e-commerce platform. Please note that the exact procedure, names of variables and events depend on your setup in GTM. For an even simpler installation, we recommend our Google Tag Manager template.
Base script for Google Tag Manager
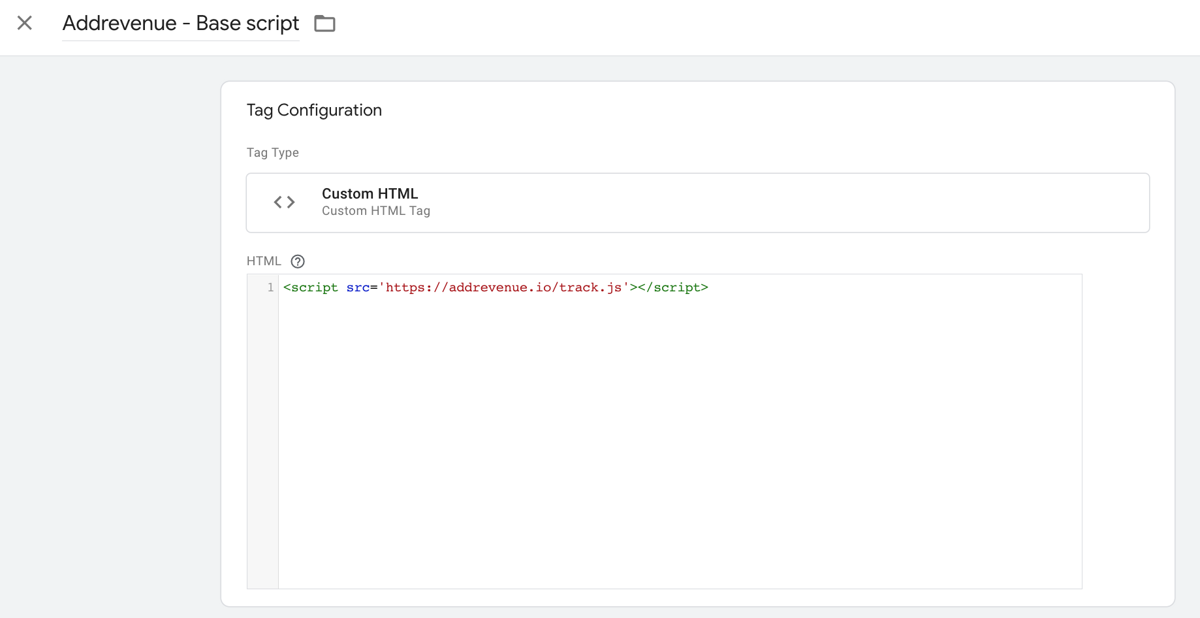
1. Create a new tag and name it "Addrevenue - Base tag".
2. Select the "Custom HTML" type.
3. Copy and paste the following code snippet in the "HTML" field:
<script async src='https://addrevenue.io/track.js'></script>
4. Add the trigger "All pages - Page View".
When you're ready, it should look something like this:
5. Click Save.
Conversion script for Google Tag Manager
This part differs significantly depending on what your variables are called, whether they were created earlier, what they contain and also which events are triggered on the thank/receipt page.
You need to have a variable for order value excluding VAT and excluding shipping, one for currency and one for order number. Also that you need a trigger to fire on the thank you/receipt page.
We assume in this example that this already exists.
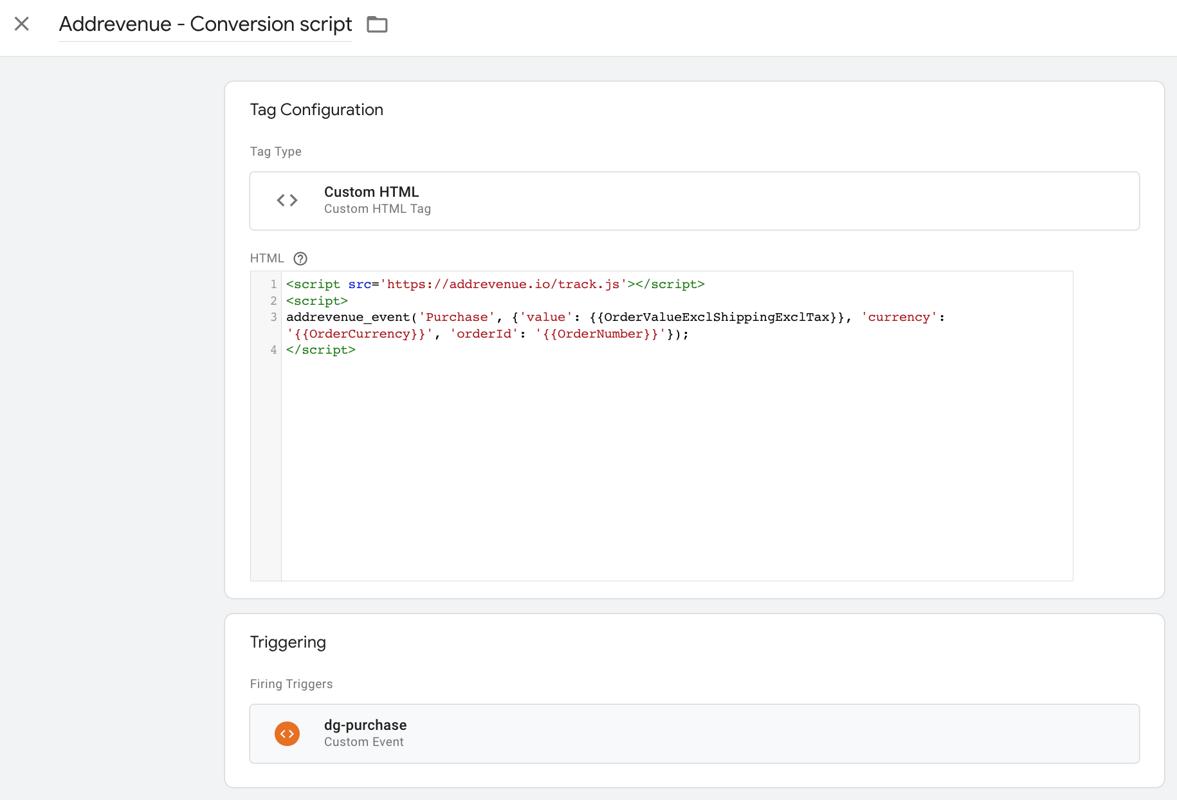
1. Create a new tag and name it "Addrevenue - Conversion tag".
2. Select the "Custom HTML" type.
3. Copy and paste the following code snippet in the "HTML" field:
<script src='https://addrevenue.io/track.js'></script>
<script>
    ADDREVENUE.sendEvent('Purchase', {
        'value': {{ JS - value_excl_shipping_and_tax}},
        'currency': '{{ DLV - currency }}',
        'orderId': '{{ DLV - transaction_id}}',
        'discountCodes': '{{ DLV - coupon }}',
        'products': {{DLV - items }}
    });
</script>
Note that the variable name depends on your specific setup in Google Tag Manager!
4. Add a trigger for your purchase event. This can be an event or a page view of the thank you/receipt page.
When it's ready, it should look like this:
5. Click Save.
6. Your tracking code is now ready to be tested. Use the preview function and when everything works you can publish your changes. Once you have installed the tracking code, we would like you to make a test purchase. See our Test purchase guide for step-by-step and troubleshooting help
If you want help installing the script in your existing Google Tag Manager, you can email support@addrevenue.io with full read and write rights, and we'll help!
Consent configuration
Both tags must be configured to fire only after the user has given consent for tracking and marketing. Firing these tags without consent may violate ePrivacy regulations — the advertiser is responsible for ensuring correct consent handling.
If you use Google Consent Mode v2:
In GTM, open each tag → Advanced Settings → Consent Settings → enable Require additional consent for tag to fire and add ad_storage.
If you use a CMP (Cookiebot, OneTrust, etc.):
Most CMPs provide a GTM integration that sets a data layer variable or fires a custom event when consent is updated. Create a trigger that fires only when marketing/tracking consent is granted, and apply it to both tags instead of “All Pages – Page View”. Consult your CMP provider’s GTM integration guide for the exact setup.
If you do not use a consent management platform:
You must implement one before using client-side tracking. Addrevenue recommends a CMP that supports Google Consent Mode v2.
Note: The conversion tag must never fire without consent, as it sends transaction data to a third-party server.
Create account
By submitting I accept addrevenue.io's terms of use and privacy policy.
This site is protected by reCAPTCHA and the Google Privacy Policy and Terms of Service apply.
By submitting I accept addrevenue.io's terms of use and privacy policy.
This site is protected by reCAPTCHA and the Google Privacy Policy and Terms of Service apply.
By submitting I accept addrevenue.io's terms of use and privacy policy.
This site is protected by reCAPTCHA and the Google Privacy Policy and Terms of Service apply.
Choose the account type that best suits your profile